
Ultimate Seed Starting Guide
As a gardener, there's a certain magic in watching tiny seedlings come to life, flourish throughout a season, and provide a rich and plentiful food source in the end. Whether you're looking to connect back with the earth or gain confidence knowing exactly where your food comes from, we have just what you need to begin your magical journey.

Vegetables, fruits, and herbs that are grown in your own garden are not only far superior in flavor to any you can buy in your local supermarket, but they are also a terrific way to provide the people you love with healthy, fresh food in the summer season. You just cannot beat the taste and joy of harvesting fruits, vegetables, and herbs!
To help you have a successful harvest this season, we have put together an ultimate guide on seed starting with all the advice, tips, and information you need to sow, grow, and harvest our Proven Harvest® tomatoes, strawberries, peppers, and basil. This guide is perfect for both seasoned gardeners and inspired beginners, so be sure to take as many notes as you need so you can get started planning your bountiful garden today!
To begin, you will need a few supplies:
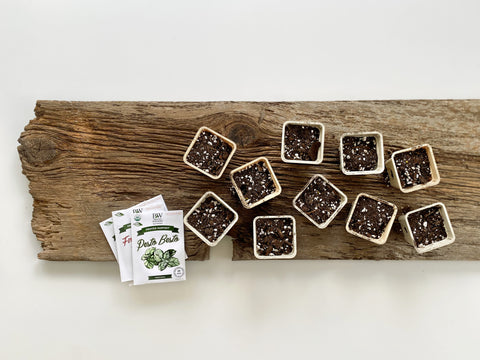
- Seeds
- Pots to germinate and grow your seedlings
- Soil
- Grow lights and Heat Mats (optional)
Seeds
Our selection of Proven Harvest Seeds gives you the opportunity to plant a few varieties of tomatoes, strawberries, basil, and even hot peppers. These vegetables and fruits are perfect to get you started on your edible garden as they are easy to grow and require little maintenance. You can buy seeds online by clicking here!
Soil
The best seed starting soil is light and fine so young roots can easily grow and navigate through the soil. It does not need to contain any fertilizers and is best if it includes sphagnum peat moss for water retention and vermiculite or perlite for aeration.
Light
Seeds need bright light to germinate. If you are sowing seeds inside a greenhouse, no worries! The seeds will love the natural sunlight provided in this space. If you are sowing seeds in a basement, or anywhere indoors without windows, you will want to provide them with grow lights. It is important to get lights that are specific for growing seedlings, as they need very intense bright light to start. Make sure your lights have a 2000-3,000 Lumen level for bright light. As for light temperature, your grow lights need to mimic daylight. This means you will need a Kelvin temperature of 4500-6500. You can find inexpensive grow lights that meet these specifications at your local garden center or online.
Planting Your Seeds
Be sure not to get your seeds wet at any time before planting. If they have gotten wet, they may not be viable or produce plants. Depending on the plant, you should sow seeds sometime between 5-8 weeks (about 2 months) before your first frost. Seed packets include a wealth of information on germination, when to start seeds indoors, when to move the plants outdoors, as well as other details. Use this information to determine if and when you should start seeds indoors, which seeds can be sown directly outside, and things like planting depth and spacing. Once you have your supplies, and it is time to sow your seeds, you can place up to 2-3 seeds in each pot.
Moisture and Warm Soil is Key
Once your seeds have been planted, consistent moisture is key for germination. Be sure the soil always feels like a damp sponge but be careful not to drown the seeds if watering overhead. A fantastic way to provide sufficient moisture for your seeds is to cover your pots with a transparent plastic wrap. You can flip the wrap every few days so too much moisture isn’t building in your pot. In doing this, you are creating a mini greenhouse.
Once the seeds have sprouted, you can release the plastic wrap and gently water overhead, or even better, bottom water your plants. This is when you place your pots in a dish or tray with water to allow the soil to soak up as much as it needs. Simply soak for 20-30 minutes and your plants will be good to go!
Another key factor to germination is soil warmth as seeds prefer a soil temperature of 65-80 degrees. Many gardeners simply rely on their grow lights to keep the soil warm, but it is also quite common to use heat mats below the pots. In fact, many farmers will use heat mats under their seed trays even when sowing their seeds inside greenhouses. This is because heat mats are extremely helpful in raising the temperature of the soil quickly for faster germination. Once the seeds have germinated, you no longer need to use the heat mats.

Hardening Off Your Plants
Once temperatures are above freezing and spring draws near, you can start hardening off your young plants to get them acclimated to the direct sunlight and outside weather. Start by setting your plants outside on a cloudy day for an hour. Gradually increase the time they are outside each day, an hour or so at a time, building up to a full day.
Planting in Your Garden
Once the chance of frost is past (depending on your zone), and you have hardened off your plants, you can transplant them into the ground or bigger pots, depending on where you are planning to grow them. Follow the spacing instructions in the chart above to successfully grow your plants. Do not worry about digging a large hole for your transplants. The closest to the actual size of your current pot, the better. Be sure to pack the soil nicely so there are no pockets of air in the soil when planted.
Watering Your Vegetable and Fruit Plants
Once you are finished, give each new plant a nice drink of water (about 5-10 seconds under a watering can) to encourage their roots to grow into the soil. Be sure to keep an eye on how much rain you get in the spring and summer to make sure your young plants are getting enough water. Your vegetable garden plants need about 1 inch of water per week. This may mean you need to water 2-3 times a week to hit that one-inch mark. If you can, watering deeply and less frequently is preferred.

Enjoy
Now you have all the information you need to successfully start your seeds indoors and grow a flourishing vegetable, fruit, and herb garden to enjoy! If you have any more questions or need any further advice, please chat with us online, email us at helpdesk@provenwinnersdirect.com or give us a call at (855) 797-5268. Our customer service team would love the opportunity to help you grow an easy and successful garden.
